Last Updated on November 1, 2026 by Daniel Osakwe
Sekonic L398A Light Meter Review
Pros
- Easy to use
- Compact design
- Affordable
Cons
- Heavier than its predecessor
- Analog design
Sekonic is a well-known company for making quality tools and products, and the L398A is one of their best. It’s a light meter that comes in a small and compact package and is suitable for measuring incident light on a scene. This makes it ideal for photography, video, and many other applications. It’s also relatively inexpensive and easy to use.
We’ve put together a review for you to find out more about the Sekonic L398A light meter. We’ll be looking at its design, features, performance, and value for money.

Table of Contents
Sekonic L398A Light Meter Review: Design
- Portable
- Looks fantastic
- Durable
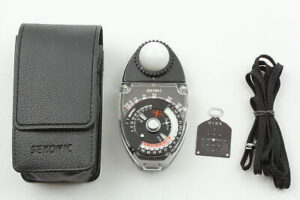
What then, is the Sekonic L398A? Well, the meter did not disappoint when I first grabbed it up after a wonderful unboxing experience. First of all, it looks fantastic. It is lovely how pure analog aura it emits. When used with so many of my analog cameras, it just looks perfect. Second, it doesn’t require batteries. Thirdly, it is smaller and heavier than before, with a metal body and solidity that suggests a well-made, long-lasting product.
Although the dial appears difficult at first, using it is dead easy and quick. It is simple to tuck into a jean pocket. It displays the EV number and allows you to adjust exposure adjustment.
On the negative side, I hesitantly eyed the “high” slide that had to be slid into the meter head in strong light, wondering if I would ever lose it (there is a hole on the back of the meter body to store this, but it’s a tight fit, so perhaps it will be okay?). Two additional meter cell covers, one for metering 2D subjects and the other for reflected readings, as well as a carry bag, are included with the meter. I don’t think I’ll use either very much.
The incident dome’s location has a prominent sticker on the rotating head that cautions that the meter produces a strong magnetic field. I immediately started using the meter because I had already seen a few YouTube videos on how to use it. In terms of the Minolta’s accuracy, I was interested to know if my purchase could be supported.
The quick answer is “no” because the readings from both meters were nearly identical. Well, I guess I could kind of rationalize the new purchase since I could now permanently attach the selective “spot” attachment to the Minolta and utilize the Sekonic L398A for incident readings. The “spot” adapter for the Minolta isn’t really a spot reading because the field reading is 10% as opposed to 1-5% for a true spot meter, but I still use it occasionally.
Sekonic L398A Review: User Experience
- Easy to use
- It displays a range of shutter speed and aperture combination
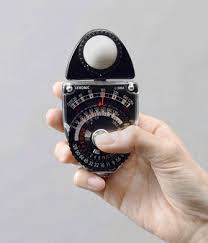
The Sekonic L398A outperforms the Minolta in terms of user experience. Since both have spinning heads, there is no distinction. By pressing the center button, reading the number of foot candles, and rotating the dial to the matching number, depending on whether the high slide was in place, you can operate the meter.
However, the Sekonic displays a wide range of shutter speed and aperture combinations, but the Minolta will only offer you a single value for the aperture on a scale (no half stops given). Even better, the dial may be turned to adjust exposure compensation between -2 and +2 stops. If you are even vaguely familiar with the exposure triangle, using this tool is generally quite simple.
Sekonic L398A Review: Performane
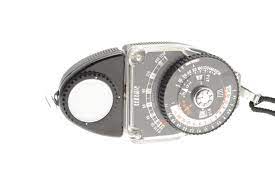
The next step is a field trip performance test. The Sekonic and my Nikon F2 along with a lovely pre-AI Nikkor-H 28mm f 3.5 were put into my backpack along with some Silvermax 100 as I rode my bike into town. The weather was perfect—warm and sunny with a few clouds swishing through the sky. My first destination was a neighborhood park, after which I proceeded through the Emirates Stadium (where the football team Arsenal plays), to Smithfield Market. I rode my bicycle over Blackfriars Bridge and continued south, stopping at the Tate and the Thames’ south bank before returning home.
At this time, I should mention two preliminary findings. The first is a quickly shifting light, which has an impact on all handheld meter users. The sun was suddenly exposed and then fast concealed by clouds as they drifted across the sky, so I had to take readings, set the Nikon, and then lift the camera to compose before the light changed and required new readings. The second is that I didn’t realize I had accidentally changed the ISO setting from 400 to something closer to 250 until I was standing on the bridge and putting the Sekonic L398A back into my bag.
The toothed mechanism for establishing the ISO value appears to not be very reliable, and it is shockingly simple to change the ISO value. After that, whenever I used the meter, I made sure the ISO value was what I wanted.
As is customary for me, I usually meter for the shadows and alter the exposure or film development time on my camera (or both). This technique was made simpler by the Sekonic L398A because I could meter the entire scene and then adjust the exposure correction. I chose +2 because it was a sunny day and intended to prevent overexposed highlights after processing.
The outcomes
I processed the film when I got home and thought, overall, the results were quite nice. Despite some frames appearing somewhat overexposed, the meter was generally doing its job. This is probably because the ISO value I had put on the meter had changed at some time.
Second Performance Test Using the EV Scale and Exposure Compensation
The next day, I packed a roll of HP5+ into my Rolleicord Vb and left on a tour of my neighborhood in North London with my Sekonic L398A. The Rolleicord has an EV setting mechanism that requires the user to choose an EV number, after which the shutter speed and aperture are engaged and coupled in accordance with the selected exposure value. The aperture (or shutter speed) adjusts in accordance with the user’s modified shutter speed.
Some people love this feature, while others despise it because exposure compensation cannot be used since the aperture and/or shutter speed cannot be separated from one another. However, I could again dial in the exposure compensation I want, read off the EV value, and set it on the Rolleicord using the Sekonic L398A. The usefulness of this device is actually noticeably better than that of the Minolta. I can see how this will be helpful as my Kodak Retina IIc uses a similar EV adjustment technique.
Final thoughts
Overall, I’m happy with my choice of the Sekonic L398A; it will go everywhere I go with my numerous meter-less cameras, and I’m crossing my fingers that I can hang onto the high slide.
But first, a word of warning. After work, I decided to examine my dependable Omega Speedmaster with a compass in light of the warning regarding magnetic fields. You guessed it—it was thoroughly magnetized! Luckily, I’m used to this happening, so it didn’t take long to de-magnetize it. However, going forward, I might just leave it off my wrist when using the Sekonic L398A.